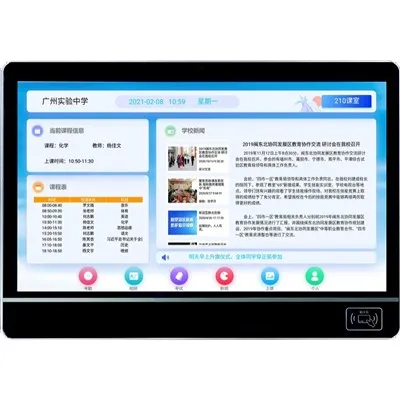
In the dynamic landscape of modern education, the seamless transition of data from an old video phone to a new one for class board use is crucial for maintaining continuity and enhancing the learning experience. As a dedicated supplier of video phone class boards, I understand the significance of this process and the challenges it may present. In this blog post, I will share valuable insights and practical steps on how to transfer data effectively, ensuring that your classroom technology remains up - to - date and functional.
Understanding the Importance of Data Transfer
Before delving into the transfer process, it's essential to recognize why moving data from an old video phone to a new one is so important for class board applications. The data stored on the old device may include teaching materials, student records, lesson plans, and multimedia content. These resources are the foundation of an engaging and effective classroom environment. By transferring them to the new video phone, teachers can continue their work without interruption, leveraging familiar content to deliver high - quality instruction.
Assessing the Compatibility
The first step in the data transfer process is to assess the compatibility between the old and new video phones. Different models may use different operating systems, storage formats, and data transfer protocols. Check the specifications of both devices to ensure that they can communicate with each other. For example, if the old video phone uses a proprietary data format, you may need to convert it to a more universal format that the new device can recognize.
Backing Up the Data
Once compatibility is confirmed, the next step is to back up the data from the old video phone. This serves as a safety net in case something goes wrong during the transfer process. There are several ways to back up data, depending on the features of the old device.
- External Storage Devices: If the old video phone has a USB port or supports external storage, you can connect a USB flash drive or an external hard drive. Copy all the relevant data, such as documents, images, and videos, to the external storage device.
- Cloud Storage: Many modern video phones support cloud storage services. Sign in to a cloud storage account (e.g., Google Drive, Dropbox) on the old device and upload the data. This method is convenient as it allows you to access the data from anywhere with an internet connection.
Transferring the Data
After backing up the data, it's time to transfer it to the new video phone. The transfer method will depend on the connectivity options available on both devices.
- Direct Connection: If both the old and new video phones support a direct connection, such as a USB - to - USB or Wi - Fi direct connection, you can transfer the data directly. Connect the two devices using the appropriate cable or establish a direct wireless connection. Then, follow the on - screen instructions to transfer the files.
- Using a Computer: If a direct connection is not possible, you can use a computer as an intermediary. Connect the old video phone to the computer and transfer the backed - up data to the computer. Then, connect the new video phone to the computer and transfer the data from the computer to the new device.
Configuring the New Video Phone
Once the data is transferred, you need to configure the new video phone for class board use. This includes setting up the display settings, network connectivity, and any software applications.
- Display Settings: Adjust the screen resolution, brightness, and contrast of the new video phone to ensure optimal visibility in the classroom. You can also configure the aspect ratio to match the class board.
- Network Connectivity: Connect the new video phone to the classroom network. This will allow teachers to access online resources, share content with students, and participate in virtual classrooms. Make sure to configure the Wi - Fi settings or connect the device to an Ethernet cable if available.
- Software Installation: Install any necessary software applications on the new video phone. For example, if you use a Virtual Classroom Display or an LED Classroom Display, install the corresponding software to enable full functionality.
Testing the System
After configuring the new video phone, it's important to test the system to ensure that everything is working properly. Try accessing the transferred data, opening different applications, and connecting to the network. Check the display quality, audio output, and input devices (e.g., touchscreen, keyboard). If you encounter any issues, troubleshoot them immediately or contact technical support.


Maintaining Data Security
Throughout the data transfer process, it's crucial to maintain data security. The data on the video phone may contain sensitive information, such as student records and personal details. Here are some tips to ensure data security:
- Use Encryption: If possible, encrypt the data during the backup and transfer process. This will protect the data from unauthorized access.
- Update Software Regularly: Keep the operating system and software applications on the new video phone up - to - date. Software updates often include security patches that can prevent data breaches.
- Implement Access Controls: Set up user accounts and passwords on the new video phone to restrict access to sensitive data. Only authorized personnel should be able to access certain files and applications.
Leveraging Advanced Features
Modern video phones for class board use come with a variety of advanced features that can enhance the learning experience. Once the data transfer is complete, take the time to explore these features and integrate them into your teaching.
- Interactive Whiteboard Functionality: Many video phones support interactive whiteboard features, allowing teachers to write, draw, and annotate on the screen. This can make lessons more engaging and interactive.
- Classroom Digital Signage System: A classroom digital signage system can be used to display announcements, schedules, and educational content. Integrate the new video phone with the signage system to keep students informed.
Conclusion
Transferring data from an old video phone to a new one for class board use is a multi - step process that requires careful planning and execution. By following the steps outlined in this blog post, you can ensure a smooth and successful data transfer. As a video phone class board supplier, I am committed to providing high - quality products and support to help you make the most of your classroom technology.
If you are interested in upgrading your video phone class board or have any questions about the data transfer process, I encourage you to reach out for a procurement discussion. Our team of experts is ready to assist you in finding the best solutions for your educational needs.
References
- [Title of a relevant book on educational technology]
- [A research paper on data transfer in classroom devices]
- [Manufacturer's documentation for the video phone models]