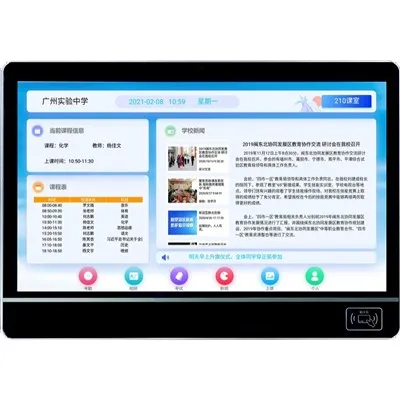
Setting up user accounts on a smart electronic class board is a crucial step that ensures efficient and personalized use of this advanced educational tool. As a leading supplier of smart electronic class boards, I am well - versed in the process and am excited to share a comprehensive guide with you.
Why Set Up User Accounts?
Before delving into the setup process, it's important to understand the benefits of having user accounts on a smart electronic class board. User accounts allow for personalized settings, such as preferred display options, saved notes, and customized teaching materials. Teachers can create and manage their own courses, and students can access specific learning resources tailored to their needs. Additionally, user accounts enhance security by ensuring that only authorized individuals can access certain features or data on the board.
Prerequisites
Before setting up user accounts, make sure that your smart electronic class board is properly installed and connected to a stable network. You will also need administrative access to the board's operating system. If you are using a cloud - based system, ensure that you have a valid subscription and access credentials.
Step 1: Access the Admin Panel
The first step in setting up user accounts is to access the administrative panel of the smart electronic class board. This is usually done by logging in with the administrator username and password. Once logged in, you will have access to a range of settings and options related to user management.
Step 2: Define User Roles
Most smart electronic class boards support different user roles, such as teachers, students, and administrators. Each role has different levels of access and permissions. As an administrator, you need to define these roles based on the requirements of your educational institution. For example, teachers may have full access to create and edit courses, while students may only be able to view and interact with the materials provided.
Step 3: Create User Accounts
After defining the user roles, you can start creating individual user accounts. This typically involves entering basic information such as the user's name, email address, and a unique username. You may also need to set a password for each account. Some smart electronic class boards allow you to import user information from a CSV file, which can save a significant amount of time if you have a large number of users.
Step 4: Assign User Roles
Once the user accounts are created, you need to assign each user to the appropriate role. This determines what actions they can perform on the smart electronic class board. For example, a teacher account may be assigned the role of "instructor", which gives them access to features like creating quizzes, grading assignments, and managing student progress.
Step 5: Configure User Permissions
In addition to assigning user roles, you can further customize the permissions for each user or group of users. This allows you to fine - tune the access levels based on specific needs. For example, you may want to restrict certain students from accessing advanced features or limit their access to specific content.
Step 6: Test the User Accounts
After setting up the user accounts and configuring the permissions, it's important to test them to ensure that everything is working correctly. Log in to each account using the assigned credentials and verify that the user has the appropriate access and can perform the expected actions. If you encounter any issues, you can go back and adjust the settings as needed.
Step 7: Provide Training and Support
Once the user accounts are set up and tested, it's essential to provide training and support to the users. This can include creating user guides, conducting training sessions, and offering ongoing technical support. By ensuring that the users are familiar with the features and functions of the smart electronic class board, you can maximize its effectiveness in the educational environment.
Integrating with Other Educational Systems
Smart electronic class boards can be integrated with other educational systems to enhance the learning experience. For example, you can integrate it with an Educational Digital Boards system to access a wider range of teaching materials. You can also integrate it with a School Announcement System to keep students and teachers informed about important events. Additionally, a Classroom Information Display can be integrated to provide real - time information about the classroom.


Troubleshooting Common Issues
During the process of setting up user accounts, you may encounter some common issues. For example, users may forget their passwords, or there may be issues with network connectivity. To address these issues, you can implement a password reset mechanism and ensure that the network settings are properly configured. Additionally, regular software updates can help to resolve any bugs or security vulnerabilities.
Conclusion
Setting up user accounts on a smart electronic class board is a multi - step process that requires careful planning and attention to detail. By following the steps outlined in this guide, you can ensure that your users have a seamless and personalized experience on the board. As a supplier of smart electronic class boards, we are committed to providing high - quality products and excellent support to help you make the most of this advanced educational technology.
If you are interested in purchasing our smart electronic class boards or need further assistance with setting up user accounts, please feel free to contact us. We look forward to discussing your requirements and helping you create a more engaging and efficient learning environment.
References
- Smart Electronic Class Board User Manual
- Educational Technology Best Practices Guides